
System Restore allows you to undo all system modifications made to your computer after you create a restore point. Setting a restore point before making changes to your system is recommended so that you can quickly undo the modifications if something goes wrong. System upgrades, driver updates, and incorrect settings can all cause the system to glitch and crash.
To overcome such difficulties, the system has a function called system restorations. You receive a system restore point with Windows 11, which you may use to reverse any new system modifications. So, in this post, we’ll mention how to create and use the system restore in Windows 11 step by step. It’s worth noting that the System Restore feature is included in Windows 11, although it’s disabled by default. To use the function, it must be manually turned on.
Enable system restore on Windows 11
On the Windows 11 operating system, you may activate system restore. When you set up a system restore on your Windows 11 PC/Laptop, it will generate a restore point for you anytime you make any changes to the system, such as installing updates. Follow the steps below to enable system restore on Windows 11:
- Open the start menu, search for Create a recovery drive, and open the first result you get.
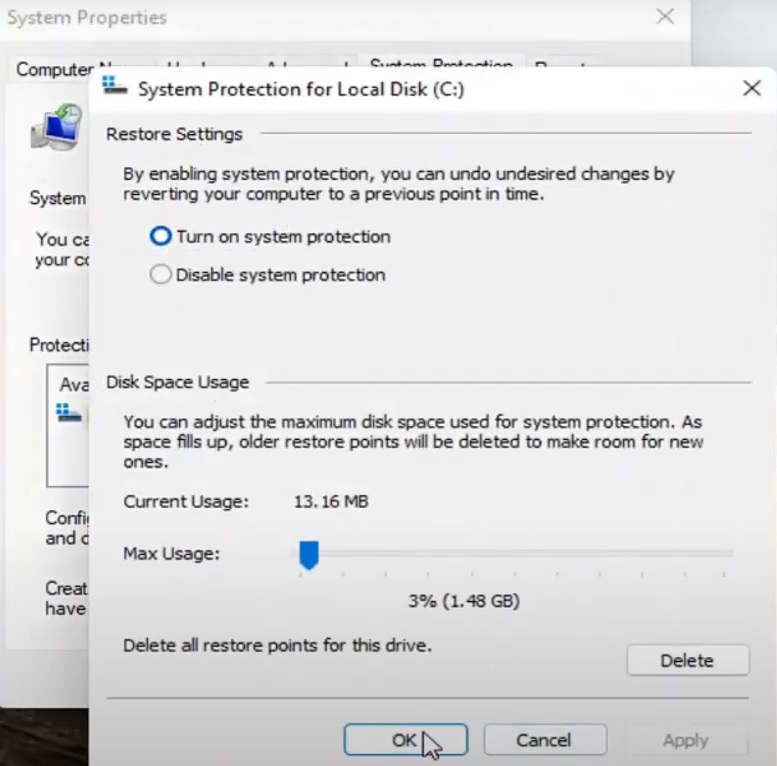
- In the system properties, navigate to the system protection tab. Select the disc on which you wish to build the restore point under the protection settings, and then click configure.
- Now, you’ll get a new prompt Window; click select the turn on system protection toggle, and then click on apply.
If you execute all of the following procedures successfully, Windows will automatically generate a restore point anytime you attempt to make changes to Windows 11.
Manually create a system restore point in Windows 11
We don’t have to do anything because the preceding step generates the system restore automatically. However, if you wish to establish a Windows 11 system restore point manually whenever you make changes to the system, you may do so by following the procedures outlined below-
- Open search and search for create a recovery drive option and then press enter to open it.
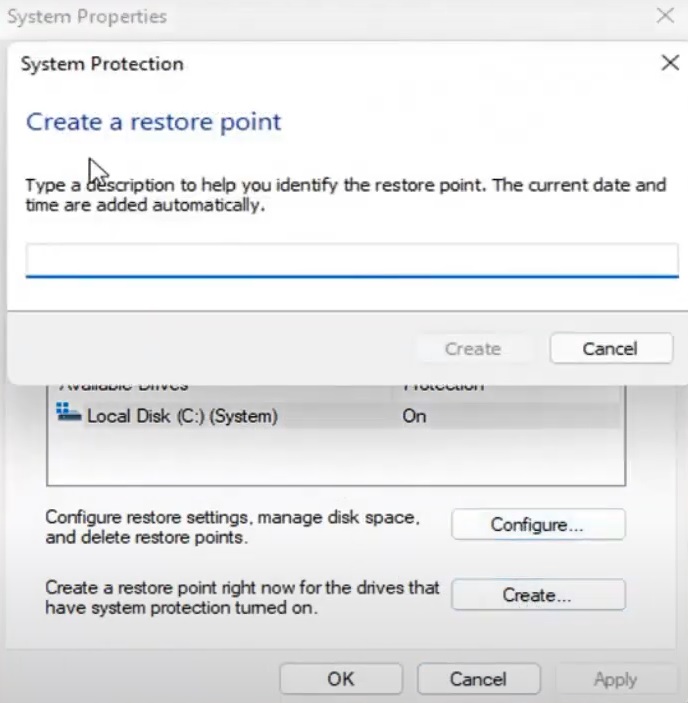
- If you do this, your PC’s System Properties will be shown. Click the “Create” option under the “System Protection” menu.
- The restore point will need a name. Check that the name is right before moving on. A restore point with that name is generated when you click “create.”
It’s now possible for Windows 11 users to manually create a system restore point at any time.
There are two ways to restore the system: automatically or manually. Next, we’ll examine how to restore the system using different techniques!
Restoring Windows 11 System
Method 1: From Desktop
As a last resort, if you wish to go back and undo the modifications, you may use the restore point you established previously to restore your system. You may restore your system using a system restore point by following the instructions below.
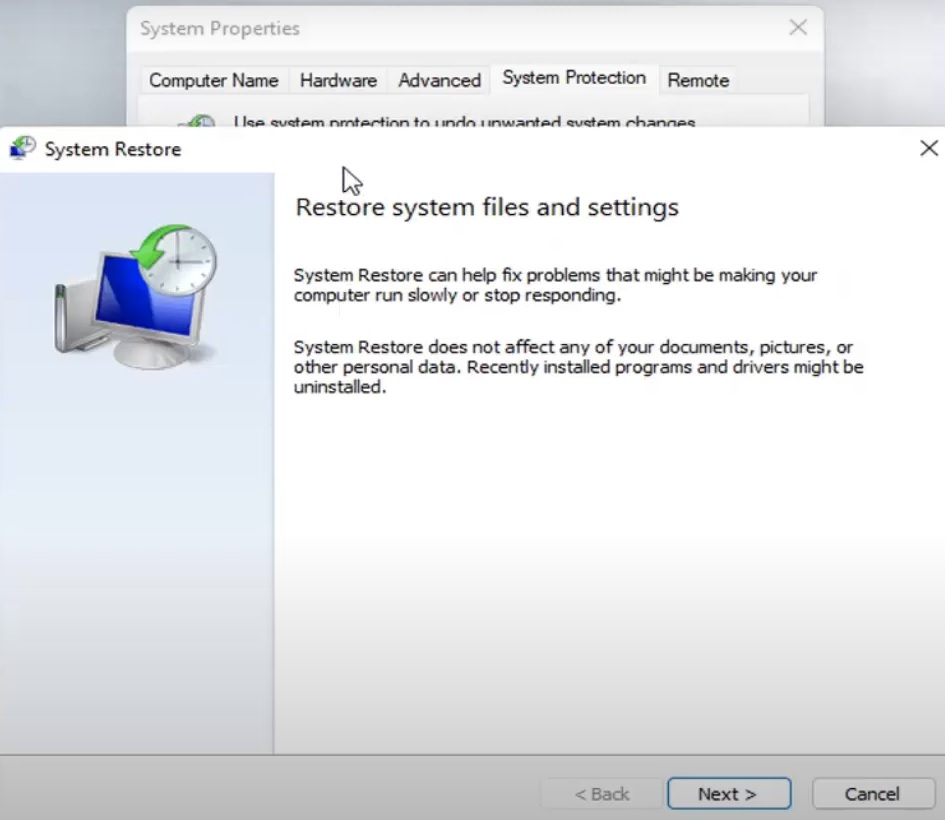
- Go to the search menu, search for Create a recovery drive, and press enter to open it. It will now open the system properties tab.
- Now, pick the restore point from which you wish to restore your computer’s operating system.
- Click on the option that says “Scan for impacted programs.” The modifications that will be made will be revealed by the results of this study. After establishing the restore point, you’ll see a list of the applications that will be deleted or added to your system due to their addition or deletion.
- Now click on the Next button on the next button on the prompt window.
- As soon as you’re done, click on “Finish” and then “Close.” This will restore your system to the last system restore point you made before you made the change.
Method 2: From Advance Startup
Your PC must be restored from the advanced starting if it can’t be accessed. The advanced startup allows you to recover your system if it crashes.
Step 1] First, open the advanced startup option in your system.
- This can be accomplished by disrupting the system’s usual boot procedure. As a first step, turn off your PC. It can be turned on by pressing the power button and then turned off when you see the Windows logo appear. In this case, the system will be unable to boot normally. You’ll need to do this 4-5 times to access the advanced starting menu.
- Click on the power option if you can reach the sign-in screen. Then, while still holding the shift key, click on the restart button.
- Alternatively, you may utilize the Windows setup to get the advanced setup menu option. If you have a Windows bootable disc, boot into the machine with it and select the option to repair your computer.
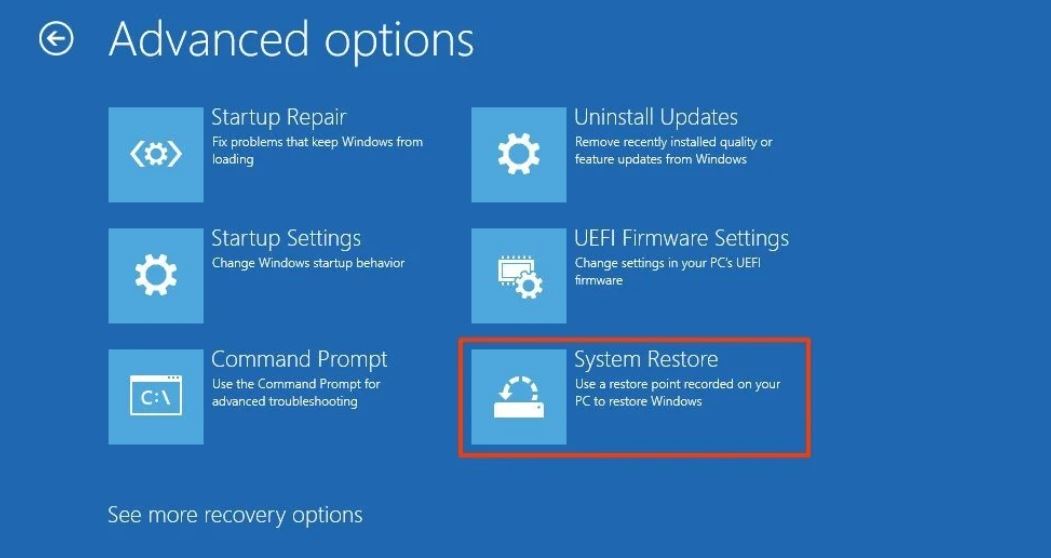
Step:2] As soon as the advanced startup opens, click on the troubleshoot option, click on the advanced option, and then click on system restore.
Step 3] Now select and enter the login credentials for your Windows account and click on the continue button.
Step:4] Scan for impacted applications after selecting a restore point and clicking on scan for affected programs. After you restore your system, this will show you all of the modifications that will be done to your system. Next, click on next to continue the system recovery process.
By following the steps mentioned above, you can restore your system from an advanced startup. If you have faced any error while restoring or creating a system restore point. Do let us know by dropping a comment down below.
Conclusion
In this post, we have mentioned multiple methods to restore or create a system restore in Windows 11 step by step. In Windows 11, system restorations allow you to restore your system to a previous state during a crash. Make the most of your time by utilizing this resource.