We have already explained “how to download Windows 11 ISO files”. Well, the last but not the last step to install Windows 11 unofficially on any system is to create a bootable USB drive. However, it’s not hard to do, but it might be a bit confusing for some new users. So, in this post, we will be dedicated to creating a Windows 11 bootable USB Drive using Rufus.
Many third-party apps can create the bootable USB of the Windows 11 operating system, but we suggest you use Rufus Tool, and therefore, in this post, the method mentioned is for Rufus software only. There are many advantages of using Rufus, like timely Windows 11 updates and more control over the file.
How to create a Windows 11 bootable USB drive
Step 1: Getting back to the point, you will need a Windows 11 ISO file (you can create with Media Creation Tool), a minimum of 8GB of USB Drive, and a Windows computer to proceed. If you meet all the requirements mentioned here, you are all good to go.
Step 2: Go to Rufus.ie website and download Rufus software for your system. Download Rufus 3.1 (latest), which hardly weighs around 1.5MB in size. After downloading it, you can run it seamlessly as it’s an executable file and doesn’t need installation. You can run the software by just double-clicking the installed file. When you double-click the file, the software will run on your computer.
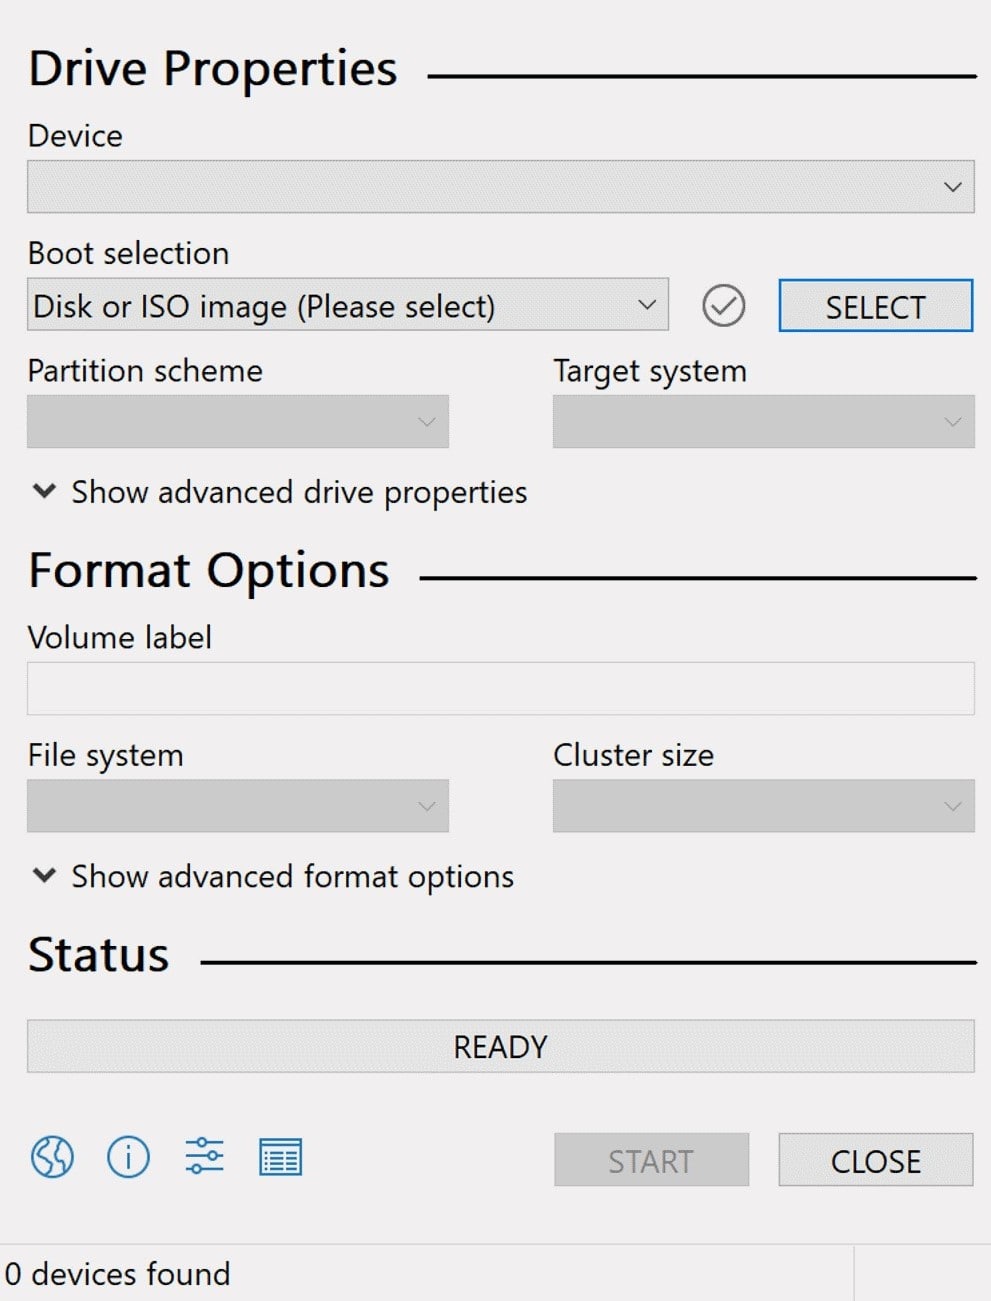
Step 3: Plug in your USB Drive-in. If you have an external drive, then Rufus will automatically select it, and if you don’t, then manually choose your desired USB Drive from the DEVICES section.
Step 4: After you choose your desired USB Drive, click on the Boot selection menu and select Non-bootable, FreeDOS, and Disk or ISO Image. You can choose accordingly.
Step 5: Now choose between the “Standard Windows Installation” and the “Windows to go” options. In Standard Windows Installation, it will run Windows on other disks, while on the “Windows To Go” option, one can directly run Windows from the device.
Step 6: Now, to proceed, you will need the BIOS mode of your system. To know about it, press the Windows+R shortcut on your keyboard, type msinfo32, and click the OK button. Now, it will show multiple information, find the BIOS Mode, and check whether it is legacy or UEFI.
Step 7: Return to Rufus and select MBR under the Partition Scheme option if your system has BIOS Legacy and select GPT for BIOS UEFI.
Note: There is an Advance option, using which you can configure the installtion more. But we suggeted you to skip it and leave it as it is.
Step 8: In the File System menu, for the GPT Partition scheme, it would be automatically set to FAT32, and for MBR, it will be set to NTFS. After choosing it, click on the “Show advanced format option,” you will get three different checkboxes. Tick all and proceed.
Step 9: After following all the steps correctly, click on the Next button. Sit back and relax; Rufus will do its work and will create a bootable Windows 11 USB Drive for you.


