Microsoft recently developed the latest version of Windows, namely Windows 11. It has many new features, including new animations, redesigned icons, a UI overhaul, and a re-touched taskbar. Also, Microsoft has made installing Windows 11 on Linux easier. Microsoft has reduced the Windows Subsystem for Linux 2 (WSL) installation process to a single command that downloads and installs all essential components, including the virtual machine platform and Linux GUI programs.
By default, the script installs the most recent Ubuntu version. If you prefer a different Linux distribution, you can add a command to select a different distro to install. Along with the new quick and easy method, a new command has been added to make updating the kernel easier with only one command. Here is a step-by-step guide to installing Windows 11 subsystem for Linux (WSL) on Windows 11.
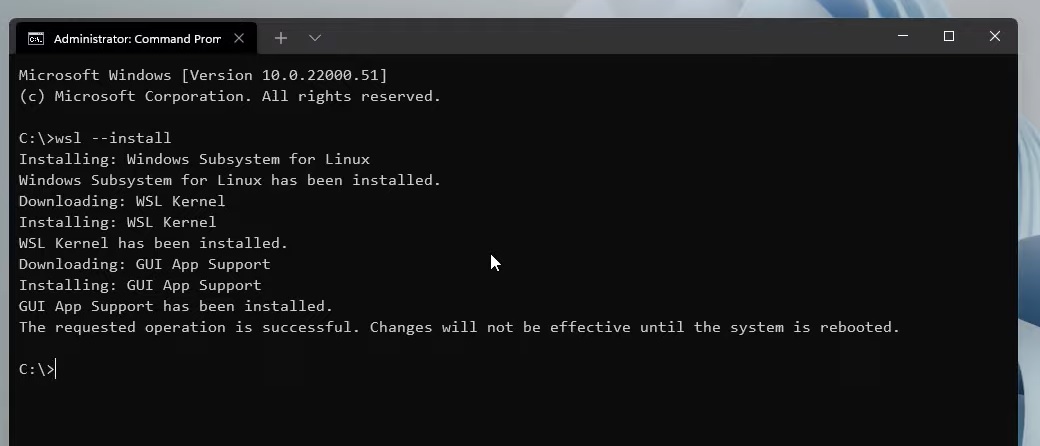
Method 1: Install Windows Subsystem for Linux (WSL) on Windows 11 with a Command
Well, to install WSL on Windows 11, first of all, open the command prompt and run it as administrator. Then type wsl –install command and press enter. After the command runs successfully, reboot your system to finish the installation process. Now, continue the Linux Distro setup. After completing the setup, On both Windows 11 and the newest version of the Ubuntu Linux distribution, the essential Linux components will be installed automatically.
Method 2: Install Windows Subsystem for Linux (WSL) with a specific distro on Windows 11
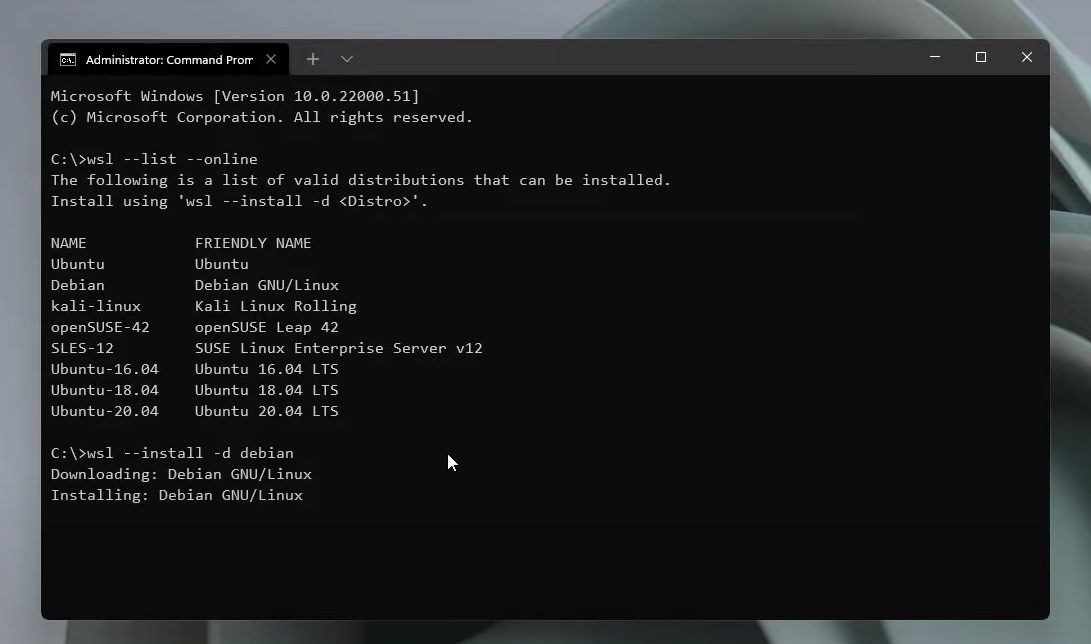
Well, if you don’t prefer the normal WSL version, which is mentioned above, and prefer another version of Linux, You can do this with WSL2, which allows you to view and select different distros. Here is the step-by-step method to install a specific distro on Windows 11.
First of all, open a Command prompt and run it as administrator. Now type the following command and hit enter wsl –list –online. Now type the command wsl –install -d DISTRO-NAME. Make sure to mention the proper distro name. After the command runs successfully, reboot your system and, again, continue the Linux distro setup as necessary. The Windows Subsystem for Linux 2 components, as well as the Linux distro you choose, will be installed when you finish the instructions.
How to Update WSL Kernel on Windows 11
If you want to update the WSL kernel to the latest version, here’s how to install it. First, open the command prompt and run it, administrator, then type the command wsl –update and hit enter. If any update is available, then it will download and install it. The WSL kernel will now be updated to the latest version.
Having that said, what do you think about installing WSL on Windows 11? Please let us know in the comment section below. Also, don’t forget to back up your data before triggering the actions. If anything wrong happens, then nothing will happen to your data.