
So, you’ve got full signal bars on your phone but no service. No service means you can’t make calls or even use mobile data. Well, don’t worry because you are in the right place.
In this article, we will go through several solutions to help you fix this issue and get back to using your cellular connection. The exact reason behind the problem and the fix varies from user to user; keep trying the solutions until the issue is fixed.
Fix 1: Restart your Phone
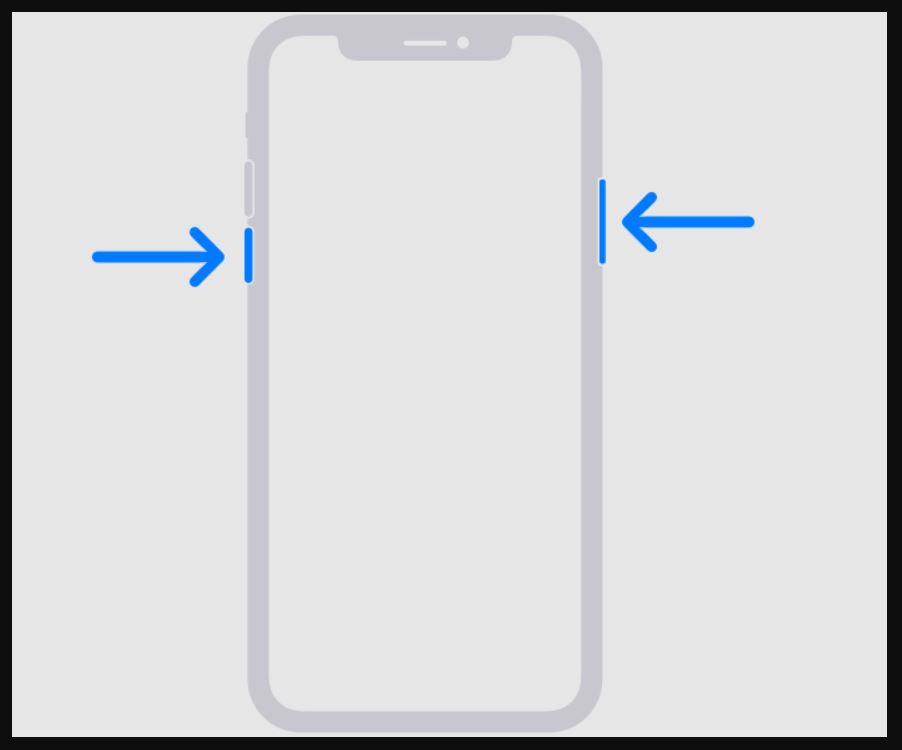
First things first, restart your phone to make sure there are no transient glitches that are causing the issue. Sometimes, there can be bugs and glitches in the software, leading to no service despite having full bars. A simple restart should fix this.
Fix 2: Charge your Phone
Your phone needs to invest a decent amount of power to search for a better signal and actually find one. If your phone is low on battery, try to charge it for a while and check back. If the issue persists, move down to the next solution.
Fix 3: Remove your Phone Case
Your phone has antenna bands on the frame that help the phone communicate with the cell towers and get signals. However, if the antenna bands are blocked or disturbed, this can create problems, leading to a loss of service or even signal.
How do you fix this? Remove your phone case if you are using one. Your phone case can block these antenna bands, especially if you use a thick one. Also, make sure to hold your phone in such a way that you don’t block the antenna bands.
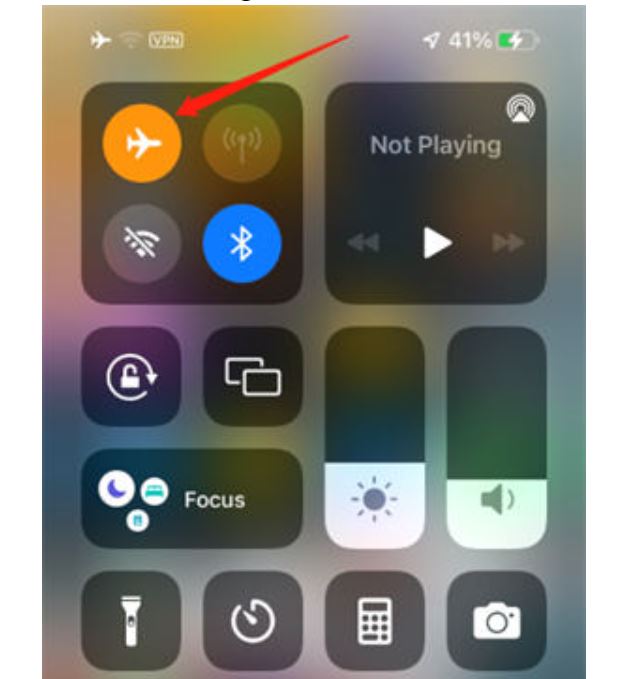
Fix 4: Toggle Airplane Mode
If the issue persists, try toggling the Airplane mode. This can help reset the network connection and resolve any transient issues. Follow the steps below:
Android:
- Open the Settings app.
- Tap Network & internet.
- Turn on the Airplane mode toggle.
- Wait for 10 seconds and turn it off.
iPhone:
- Open the Settings app.
- Turn on the Airplane Mode toggle.
- Wait for 10 seconds and turn it off.
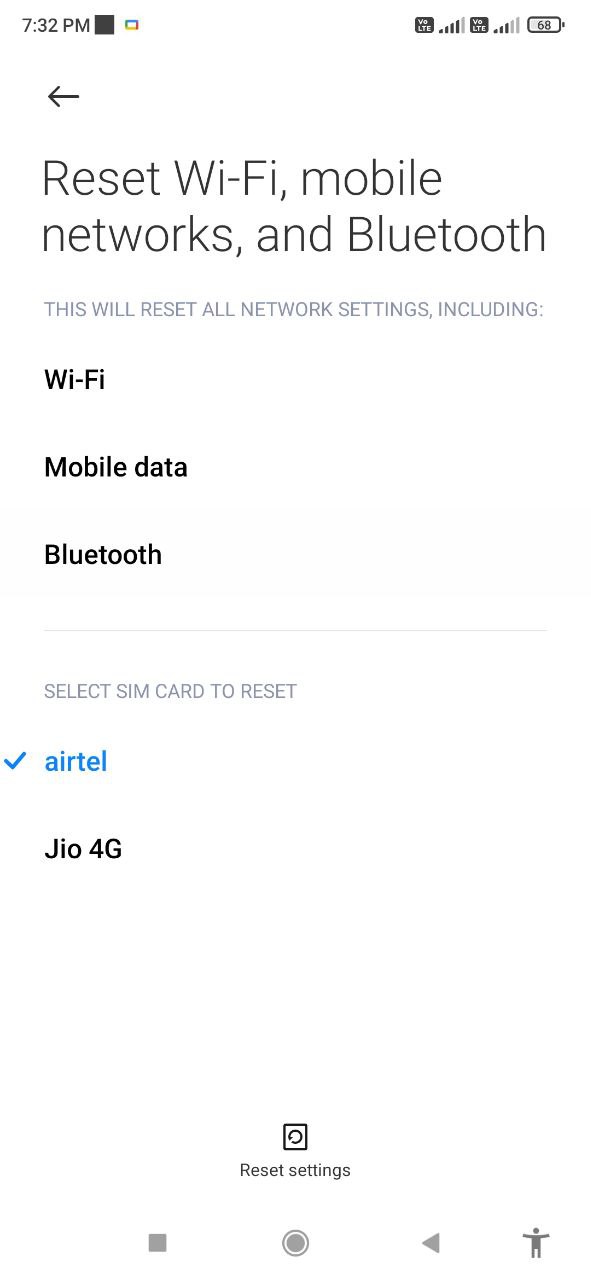
Fix 5: Reset Network Settings
If you still have no service, reset your network settings. This will help eliminate any misconfigurations or incorrect settings that could be causing the issue. Resetting your network settings will remove all the saved Wi-Fi networks, VPNs, Bluetooth devices, and other network configurations.
Android:
- Open the Settings app.
- Scroll down and tap System.
- Tap Reset options > Reset Wi-Fi, mobile, and Bluetooth.
- Tap Reset settings and enter your phone’s PIN, password, or pattern.
- Tap Reset settings again to confirm.
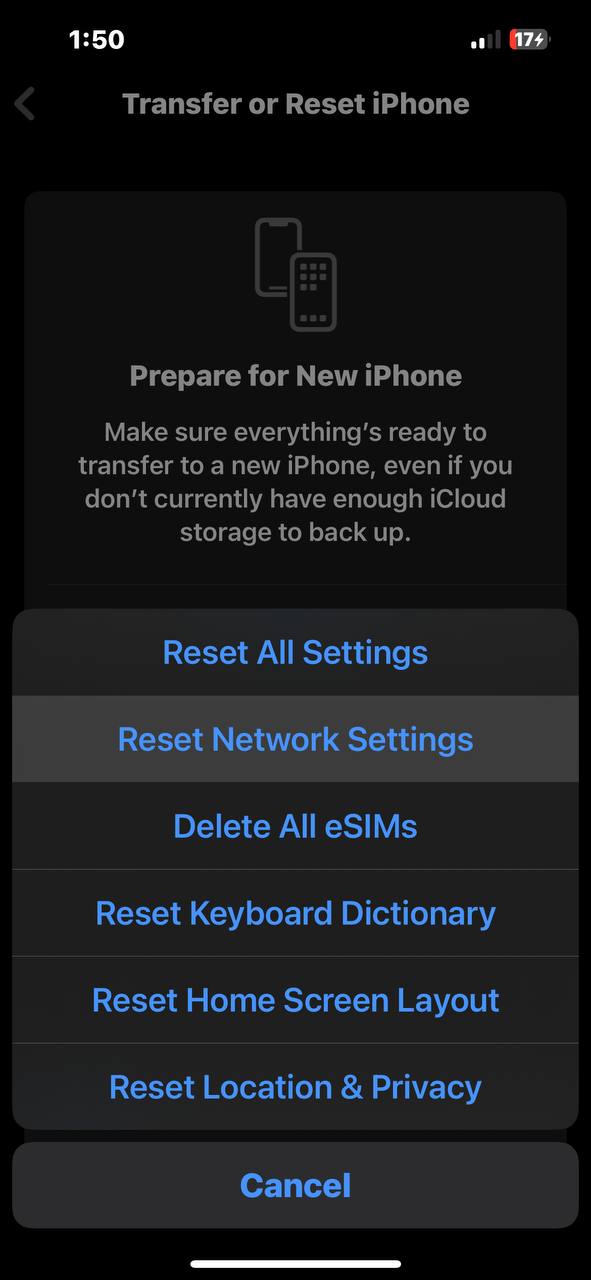
iPhone:
- Open the Settings app.
- Tap General.
- Then, tap Transfer or Reset iPhone > Reset.
- Tap Reset Network Settings and enter your iPhone’s passcode.
- Tap Reset Network Settings again to confirm.
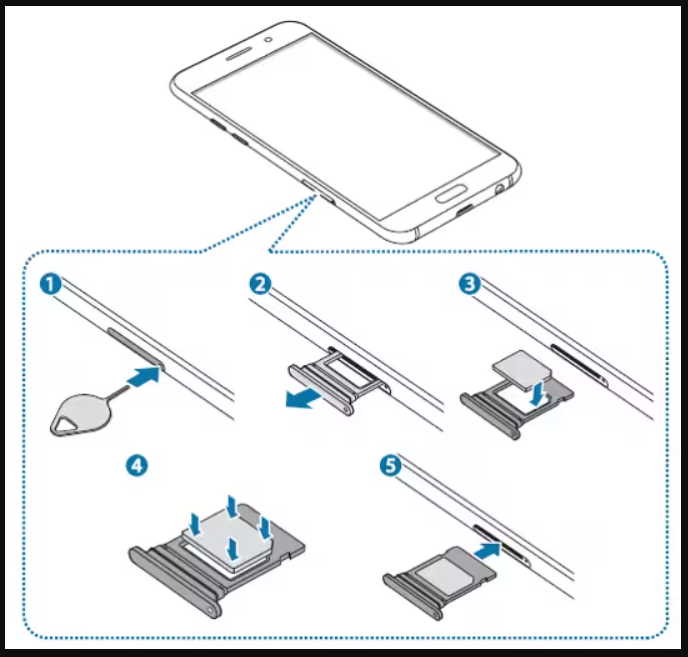
Fix 6: Reinsert the SIM Card
Sometimes, the issue can be with your SIM card. To rule out any issues related to the SIM card, reinsert it. Just remove the SIM card and check for any physical damage or corrosion. If there are any signs of damage, you might want to get it replaced with your Carrier.
If the SIM card seems fine, wipe its contacts with cotton or a soft cloth and put it back in. Restart your phone after reinserting the SIM card and see if the issue has been resolved.
Fix 7: Update Carrier Settings
Your device’s carrier settings dictate how it should interact with the infrastructure of your network provider. Even with full bars, service outages can occur if these settings are outdated. Updating these settings should fix the problem of no service, even with full bars.
Android:
- Open the Settings app.
- Tap Network & internet.
- Tap Mobile Network> Advanced > Carrier settings. If you don’t see this option, contact your Carrier.
- Finally, tap on Update carrier settings.
iPhone:
- Open the Settings app.
- Tap General > About.
- Tap on Carrier and see if an update is available.
- Follow the on-screen instructions to finish installing the update.
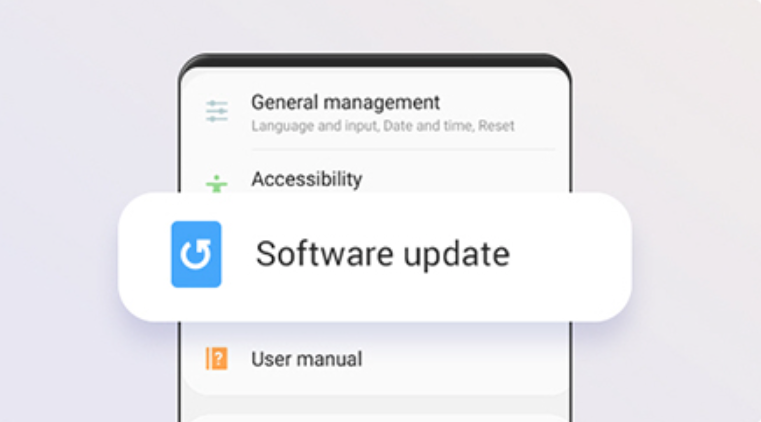
Fix 8: Software Update
You also need to make sure that your phone’s software is up to date. If the software is outdated, you might be unable to use your phone fully. Updating the software will also bring other fixes and improvements to your phone.
Android:
- Open the Settings app.
- Scroll down and tap System > Software update.
- Tap Check for updates.
- If an update is available, tap on Download & install > Restart now.
iPhone:
- Open the Settings app.
- Tap General > Software Update.
- If an update is available, tap on Download and Install.
- Follow the on-screen instructions to finish installing the update.
- Restart your iPhone after installing the update.
Fix 9: Switch to 4G
While 5G can be enticing, it is still not as stable as its older generations, like 4G and 3G. 5G is excellent for high-speed internet but not for making calls. Also, 5G can get unstable, leading to no service on your phone. Try switching to 4G and see if the issue is resolved.
Android:
- Open the Settings app.
- Tap Network & internet.
- Tap on SIMs and select your SIM card.
- Scroll down and tap on Preferred network type.
- Select 4G or LTE.
iPhone:
- Open the Settings app.
- Tap Cellular or Mobile Data.
- Tap Cellular Data Options.
- Tap Voice & Data and select 4G.
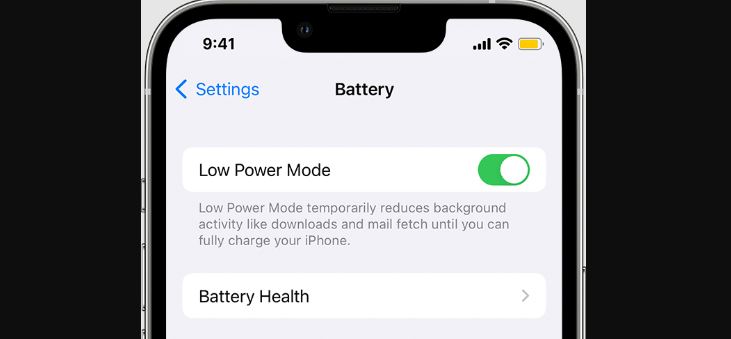
Fix 10: Turn Off Battery Saver Mode
As previously discussed, your phone needs enough power for a strong service. Turning on the battery saver mode restricts your phone to less power than usual. Try turning it off and see if you get service on your phone. Follow the steps below:
Android:
- Open the Settings app.
- Tap Battery > Battery saver.
- Turn off the toggle next to Use Battery Saver.
iPhone:
- Open the Settings app.
- Tap Battery.
- Turn off the toggle next to Low Power Mode.
Fix 11: Check for Carrier Outage
Your Carrier might be experiencing an outage, so you will not have a signal or service. The full bars usually don’t mean anything and are likely a glitch. Contact your Carrier and enquire about the outage. If there is an outage, you can only wait for the Carrier to fix it.
Fix 12: Check for Roaming
If you currently are in one place and your SIM card was activated in another, you have to turn on Roaming to be able to use it normally. This is likely the reason why you have full bars with no service. Follow the steps below to turn on Roaming:
Android:
- Open the Settings app.
- Tap Network & internet.
- Tap SIMs and select your SIM card.
- Turn on the toggle next to Roaming and Automatically select Network.
iPhone:
- Open the Settings app.
- Tap Cellular or Mobile Data.
- Tap Cellular Data Options.
- Turn on the toggle next to Data Roaming and Voice Roaming.
Note: If you are in your usual place, you might want to turn off Roaming instead.
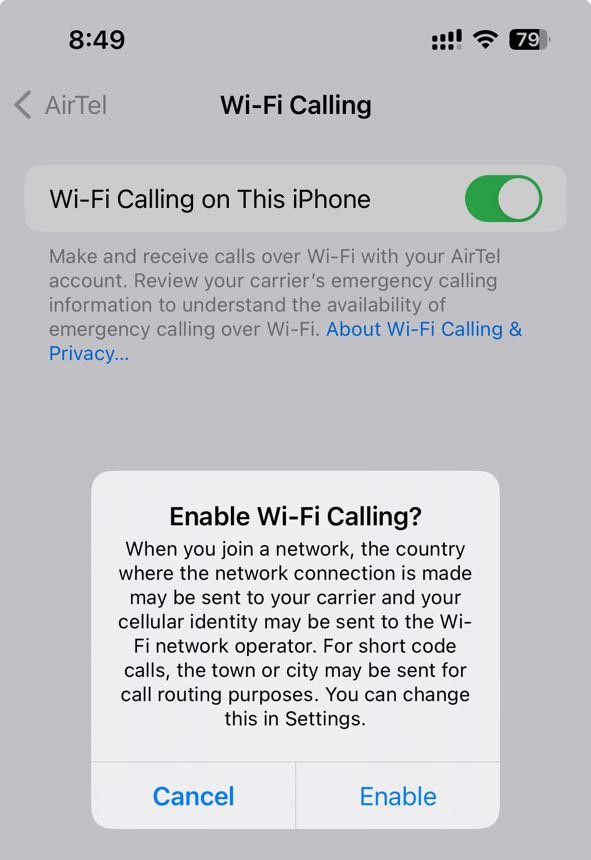
Fix 13: Turn Off Wi-Fi Calling
Although very useful in specific scenarios, Wi-Fi calling can affect your cellular connection badly. While it can boost indoor connectivity, it can do quite the opposite outdoors. Turn off Wi-Fi calling on your SIM card to ensure it prioritizes mobile Network over Wi-Fi. Follow the steps below:
Android:
- Open the Settings app.
- Tap Network & internet.
- Tap on SIMs and select your SIM card.
- Tap on Wi-Fi calling.
- Turn off the toggle next to Use Wi-Fi calling.
iPhone:
- Open the Settings app.
- Tap on Phone > Wi-Fi Calling.
- Turn off the toggle next to Wi-Fi Calling on This iPhone.
Fix 14: Check Date and Time Settings
Another basic but crucial step is to check the time and date on your device. Your device and the Network can’t stay in sync if the date and time settings aren’t correct, which can cause service issues. Check that your time and date settings are right:
Android:
- Open the Settings app.
- Scroll down and tap System.
- Tap Date & time.
- Turn on the toggles next to Set time automatically and Set time zone automatically.
iPhone:
- Open the Settings app.
- Tap General > Date & Time.
- Turn on the toggle next to Set Automatically. If the toggle is already on, turn it off and then turn it back on.
Fix 15: Factory Reset (Optional)
As a last resort, you can try to factory reset your phone. Data loss makes it risky, yet it works well for complicated software problems. Always back up your important data before performing a factory reset, and only resort to this option if all other troubleshooting methods have failed. Follow the steps below:
Android:
- Open the Settings app.
- Scroll down and tap System.
- Tap Reset options.
- Tap Erase all data (factory reset).
- Tap Erase all data and enter your phone’s PIN, password, or pattern.
- Follow the on-screen instructions to finish the reset.
- Once reset, set up your phone again and see if the issue has been resolved.
iPhone:
- Open the Settings app.
- Tap General.
- Then, tap Transfer or Reset iPhone > Reset.
- Tap on Erase all Content and Settings and enter your iPhone’s passcode.
- Follow the on-screen instructions to finish the reset.
- Once reset, set up your phone again and see if the issue has been resolved.
Fix 16: Contact Carrier Support
Contact the Carrier’s support team if none of the above solutions worked. Contact your Carrier’s support staff for more detailed information on current network conditions, possible outages, or problems with your account. They can also help you troubleshoot or escalate the issue if necessary.