
Connecting to your Home Assistant remotely via SSH can be helpful when you are not home. This will allow you to execute commands on your local machine remotely as if you were on your Home Assistant server. However, setting this up can be tricky. But don’t worry; this article will guide you on connecting to your Home Assistant via SSH. So, without further ado, let’s begin.
How to Set up SSH for your Home Assistant
To use SSH, you must install and set it up. Follow the steps below to set up SSH for your Home Assistant:
Step 1: Install SSH & Web Terminal
- First, open the Home Assistant page on your browser.
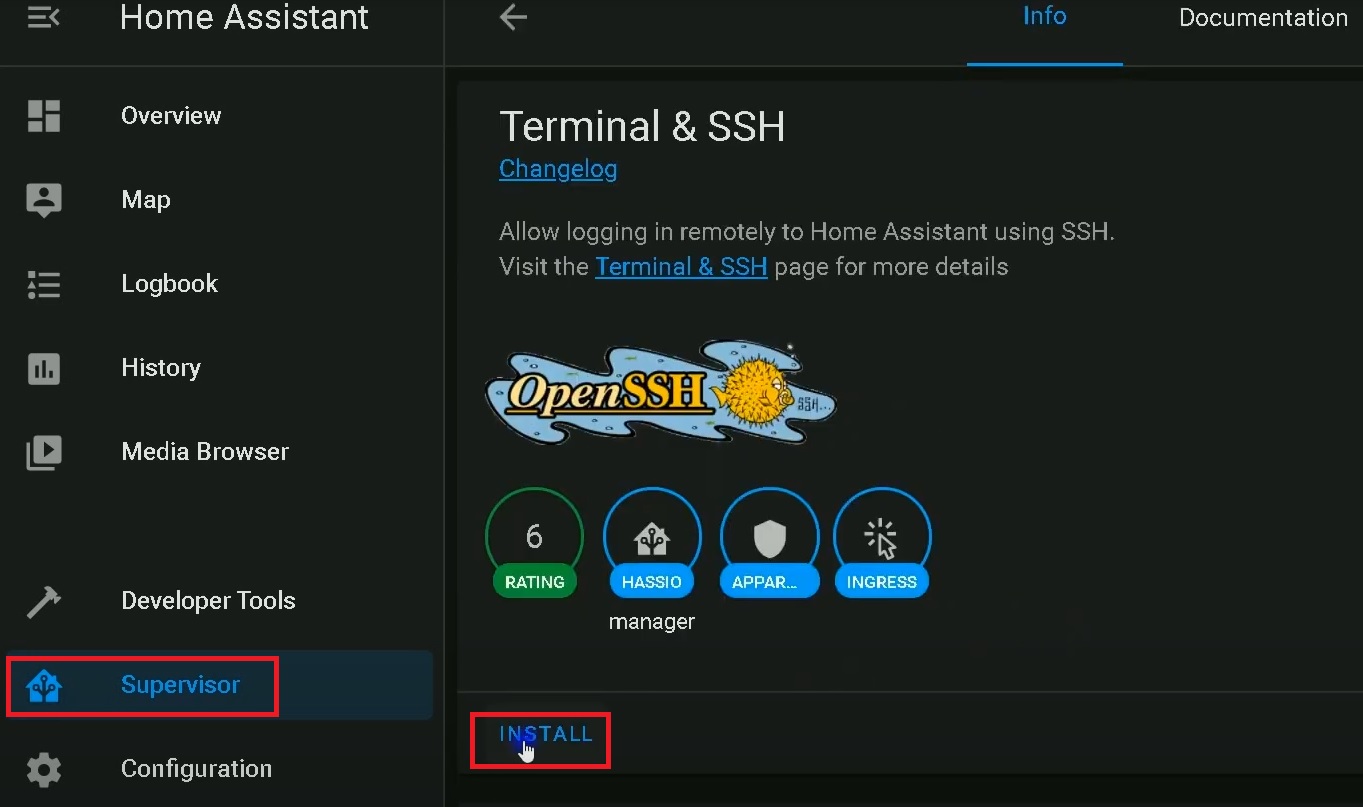
- Then, click on the “Supervisor” option in the sidebar.
- Click on “Add-on store.” This will open up the add-on store.
- Look for the “Terminal & SSH” add-on and click on it. You can also search for it to find it quickly.
- Finally, click on “INSTALL.”
Step 2: Create an SSH Key
- Once the add-on is installed, click on the “Configuration” tab.
- Here, you need to enter a username, password, and authorized_keys.
- For the authorized_keys, you’ll need to create an SSH key.
- Open your Command Prompt or Terminal on your computer.
- In the terminal window, type the following command and hit Enter. This will generate an SSH key.
ssh-keygen
- Then, choose the location to save the key. Press “Enter” to save it in the default location.
- If the key already exists, don’t overwrite it. Instead, use the existing key.
- You may be asked to enter a passphrase; hit the Enter key twice to skip it for convenience.
- Now, check the directory for the public key using the following command:
cd ~/.ssh && ls
- Note the directory of the public key, open it in a text editor like Notepad, and copy the contents.
- Go back to the Home Assistant SSH & Web Terminal add-on configuration and add the authorized key by pasting the contents of the public key in a new line. Make sure to add a dash “-“ and white space before pasting the key.
- Click SAVE and then click RESTART ADD-ON to restart the add-on.
- Check the add-on logs from the “Log” tab to ensure it has started correctly.
- Scroll down, and you should see three messages— “Starting the Home Assistant STDIN service…,” “Starting the ttyd daemon…,” and “Starting the SSH daemon…”. If you see these messages, then it means that the SSH add-on has started correctly.
- If you get an error, you have done something incorrectly. Make sure to go back and repeat the steps to fix the error. You can continue with the next step if you don’t get an error.
Step 3: Connect to your Home Assistant
- Open your Command Prompt or Terminal on your computer.
- In the terminal window, type the following command and hit Enter. This will allow you to connect to Home Assistant via SSH. (Replace “username” with your Home Assistant’s username and “IPaddress” with your Home Assistant’s IP address.)
ssh username@IPaddress
- Enter your password when prompted.
- You are now connected to Home Assistant via SSH and can execute commands as if you were on the server.
How to Connect With SSH Directly Via Home Assistant
You can also directly add the Terminal option in the sidebar of your Home Assistant. To do this, you need to follow the steps below:
- First, open the Home Assistant page on your browser.
- Then, click on the “Supervisor” option in the sidebar.
- Click on “Add-on store.” This will open up the add-on store.
- Look for the “SSH & Web Terminal” add-on and click on it. You can also search for it to find it quickly.
- Finally, click on “INSTALL.”
- Please wait for the add-on to install, as it may take some time.
- Once the add-on is installed and running, go to the “Info” tab and look for the “Show in sidebar” option.
- Toggle the “Show in sidebar” option to “ON”.
- You should now see the Terminal option in the sidebar of your Home Assistant.
- Click on Terminal in the sidebar, and you should be able to execute commands as you normally would.
- As a bonus tip, you can type the “ha help” command to see all the available commands on your home assistant.
You can watch “kian.smarthome” YouTube channel’s video below
Final Words
So that’s how to connect to your Home Assistant via SSH. In this article, we have guided you through this process in a step-by-step manner so that it’s easy for you to follow up. We hope you have successfully connected to your Home Assistant server via SSH. If you have further questions, let us know in the comments below. We will try to help you out.


For anyone else ending up here for setup (Step 3), one big change to this path to make it work.
It actually needs to be
ssh root@IPaddress
and NOT using pub/private key, but password method instead.