In the recent article, we discussed several ways to determine whether your PC/Laptop has a TPM 2.0 chip. Well, For those unaware, the minimum system requirements for Windows 11 include a TPM 2.0 chip. To be officially eligible for Windows 11, your system must have the TPM chipset. But what about those who don’t have a TPM chip in their system? Well, they can contact their manufacturer to install the TPM chip (If eligible). There are many PCs in the market which doesn’t support TPM chip. Well, for those in this post, we’re discussing how to bypass the Windows 11 TPM 2.0 requirement and install the Windows 11 OS on any of your PC/Laptop without a TPM chip.
The full form of TPM is a Trusted Platform Module, which is a microchip integrated into the hardware of the computer. It helps to carry out all cryptographic operations and offers hardware-level security to the device by performing various security measures.
Windows 11 TPM 2.0 Bypass: Ways to install Windows 11 without TPM
TPM 2.0 Bypass Method 1: By modifying the registry
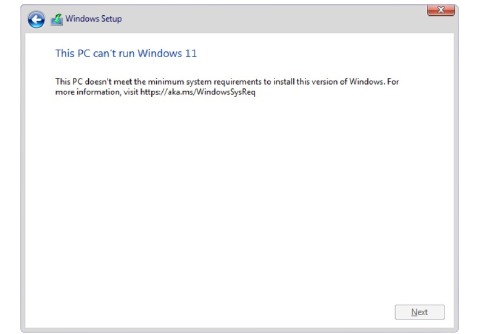
The method is simple, and one can do this easily; for this, you have to flash the Windows 11 package and wait until the screen shows the warning “The PC can’t run Windows 11″.
Whenever you get the pop-up warning, press the Shift+F10 shortcut on your keyboard and press Enter.
Now, the command prompt will open up. Type regedit.exe, and enter. You must create a new key, “LabConfig” under HKEY_LOCAL_MACHINE\SYSTEM\Setup.
After creating the key LabConfigs, create these two new entries on it
BypassTPMCheck=dword:00000001
BypassSecureBootCheck=dword:0000000.
Now, the message will disappear from the screen, and the installation will go successfully.
Most probably, the first method will work for most of the users, but if it doesn’t work for you, here is another method for you.
Create a .rig file with the following line of code:
Windows Registry Editor Version 5.00 [HKEY_LOCAL_MACHINE\SYSTEM\Setup\LabConfig] “BypassTPMCheck”=dword:00000001 “BypassSecureBootCheck”=dword:00000001
Now save this on your USB Drive and perform the installation again whenever the official version is released.
When installing, open the command prompt by pressing Shift+F10, type Notepad, and enter.
Now Notepad will appear, in that locate and apply .reg file and proceed.
Your installation process will be completed successfully, and this will bypass the TPM 2.0 and Secure boot requirement of Windows 11.
TPM 2.0 Bypass Method 2: Create your Installation media by modifying the ISO file
If you are worried about using the first method, you can use the method to install Windows 11 in your system by customizing the ISO file. Well, for this, you need to go to the source folder of Installation Media with a version of that file from Windows 10 ISO.
Replace the appraiserres.dll from the version of Windows 10 ISO. Now, re-create the ISO file.
You can use any third-party app to recreate the ISO file, like Rufus or Anyburn.
After completing, run the setup again. If you want to deploy the new OS on your system for a clean installation, you can always use Windows ADK to automate the process and create your own ISO.
Note: Well, all the methods mentioned above are based on the leaked version of Windows 11 ISO. WindowsLatest website has discovered both methods (We have not had a chance to test them ourselves). We can’t confirm whether it’s going to work for the official version of the Windows 11 operating system or not. But most probably, it will work. Did the bypassing trick work for you or not? Do let us know by dropping a comment down below.