The Search Engine Tech Giant unveiled its most awaited Pixel series—The Pixel 7 series. The series includes the regular Pixel 7 and Pixel 7 Pro, which got revamped designs, a new chipset, and much more compared to the predecessor. Apart from the iconic upgrades, the Pixel 7 series experienced various bugs and issues. Users frustrated with the problems are venting their anger on social media platforms.
One of the most discussed problems with the series is the rapid battery drain issue. Users have complained about the same since the launch of the series. A user from Reddit facing the case said, “Had the Pixel 7 for three weeks, love the phone, but the battery is horrendous, the worst from any phone I’ve ever had; I had the s21 before this and would last me pretty much all day from 10 am until 10 pm, the Pixel 7 is getting to 3 pm and already on <20%, anyone else having battery issues?” This was the one, but many users are complaining about the issue; you can judge by clicking on the sources given here. (1,2,3).
This article might be helpful if you also have excessive battery life drain issues on any Pixel 7 series devices. You are supposed to read this post thoroughly, where we will be listing various methods to get rid of the battery life issue, and you might find one of the required means or solutions to the problem. Also, we can’t predict if the next generation Tensor Chipset will be optimized to resolve battery-related issues. We have enlisted some of the workarounds below, which can be helpful for you to resolve the issue. Without further due, let’s get started.
9 Ways to Fix Pixel 7 Series Quick Battery Drain Problem
To solve the battery related problems, follow the below-listed workarounds:
1. Restrict Apps Battery Usage:
Starting with the basic workaround, you should restrict the app from consuming battery. To do that, follow the below steps:
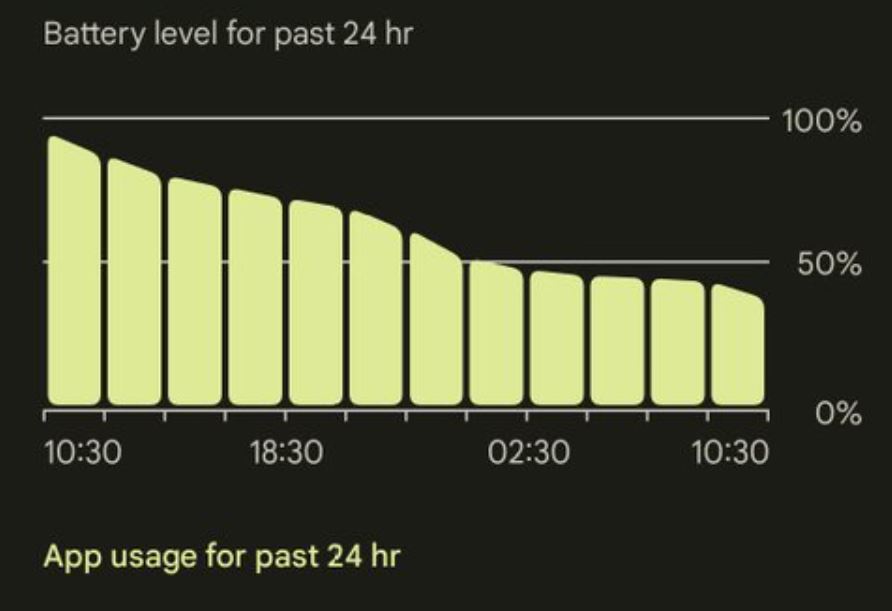
- Open the Settings application on your device.
- Head over to Battery.
- Tap the ‘Battery Usage’ section.
- Under the list ‘App usage for past 24 hr’, check for the app’s comparatively consuming battery.
- Tap the first application from the list and select ‘Restricted’ from the menu. Please do the same for all the following apps, consuming more battery and restricting it.
- After performing the step, check whether it worked for your Pixel 7 or Pixel 7 Pro-consuming battery.
2. Disable Mobile Data Always Active
If you are using WiFi instead of Mobile Data, the device will give preference to use Mobile Data if there are not sufficient signals of WiFi. This will result in no internet stoppage, and you will not be able to stop your work in between. However, this switching process will somewhere result in a battery drop. This might be the reason for the rapid battery drain, so you should try to reach out to disable the feature. Follow the below steps to do so:
- First of all, enable Developer Options. To do this, head to settings, then About Phone, and tap on the build number multiple times until the Developer Option turns ON.
- Now, go to Settings, then System, then Developer Options.
- In the Developer Options, search for Mobile Data Always Active and turn it OFF.
- Check if it can increase some numbers on your battery percentage.
3. Disable Always On Display
If you are facing an excessive battery drain issue, then make sure to turn OFF Always On Display, as it has always been a major culprit in dropping the battery percentage. To turn it OFF, follow these steps:
- Open the Settings application on your device.
- Go to Display, then Lockscreen.
- Search for the ‘Always Show Time and Info’ Toggle, and turn it OFF.
- Do tell us if that helps to gain some improvement in battery life.
4. Lower the Screen Timeout
Screen Timeout is nothing but a duration after which your device will turn OFF spontaneously. The more the Display is ON, the more battery it consumes. So always try to keep the Timeout as low as possible, i.e., a minimum of 15 seconds or a maximum of 30 seconds. To follow the same, go through the below-listed steps:
- Open the Settings application on your device.
- Go to Display.
- Go to the ‘Screen Timeout.’
- Set the Timeout as low as possible; in our view, 15 seconds is the sweet spot.
- Check if that increases the life of your battery.
5. Disable Tap to Wake
It is an exciting feature that lets you help you know about notifications, messages, and other essential details without unlocking the device. This will happen when you tap on your device when it is OFF. To support it, there is another option named ‘Lift to Check.’ This helps and shows you the notifications when you pick up your Phone. Disable both options, as it has to turn out to be one of the significant battery juicers, with the help of the following steps:
- Open the Settings application on your device.
- Go to Display.
- Go to the Lockscreen section.
- Search for ‘Tap to Check Phone’ and ‘Lift to Check Phone.’
- Disable both options and check whether it fixes your device’s excessive battery drain issue.
6. Turn OFF Adaptive Connectivity
For those who are unaware, Adaptive Connectivity is a feature that helps your device automatically switch from 5G to 4G or 4G to 5G based on the usage scenario. This happens constantly, so battery life is impacted.
For example, if you are scrolling and doing a little bit of a task that doesn’t require much performance, the feature will switch from 5G to 4G to conserve battery life. If you are performing high tasks, playing video games, or watching content online, the feature will automatically switch from 4G to 5G. However, this constant switching through the network will have a significant impact on battery life than it is doing by using the Adaptive Connectivity feature. So, better turn it OFF, and to do so, here’s what you need to do:
- Open the Settings application on your device.
- Go to the Network and Internet Section.
- Please search for the Adaptive Connectivity feature and disable it.
- Check if it saves some battery life on your device.
7. Disable Physical Activity Permission
If this sounds like something new to you, there is nothing to worry about; it is just permission that allows your device to count the steps without using a Smartwatch. If you have a Smart Watch, you must have an application to run it and explore the features; this might be the case for the decrease in battery percentage. The latter has become the major in battery drainage and device overheating. The permission running in the background affects your smartphone’s battery life. Restrict the consent by following the below steps:
- Open the Settings application on your device.
- Go to Applications.
- Search for the app that is used for the smartphone to get linked. (For example, Samsung Health App).
- Go to the permission settings of the application.
- Change the application permission from the ‘Allowed’ state to the ‘Disallowed’ state.
- Check for any difference in the battery life of your smartphone.
8. Enable Battery Saver Mode
This is the most efficient method of the above-listed ones, which will help you save comparatively more battery. But if you enable the option, you must sacrifice features like a fast refresh rate, auto-sync component, etc. This is subjective if you want to compromise the user experience or the battery life. Enabling the option will ultimately impact your user experience. So before proceeding with this, make sure about that. And if you want to allow the option, here’s how you can do it:
- Open the Settings application on your device.
- Go to Battery.
- Go to Battery Saver.
- Enable the Battery Saver option.
- Check for any improvement in battery life, which will ultimately improve.
9. Enable Extreme Battery Saver
If you are too concerned about your rapid battery drain and want a practical solution, ‘Extreme Battery Saver’ awaits you. ‘Extreme Battery Saver’ is even better than ‘Battery Saver Mode. But using that will limit some usage of some applications. This option will hold some of the functionalities of most apps and services. But you can add some apps of your choice to the board of which the features shouldn’t be compromised. Using this feature before going to bed and stopping using it after waking up in the morning will be helpful. So, if you want to enable the mode, then you must follow the below process:
- Open the Settings application on your device.
- Go to Battery.
- Go to the Battery Saver Option.
- Go to Extreme Battery Saver.
- Select ‘Always use’ when asked when to use it.
- Return to the menu, select your “essential” apps, and add them that shouldn’t be affected when the mode is enabled.
- Check for the results.
Conclusion
The solutions mentioned above are effective, especially the last two, and they should solve the battery drain issue you are facing with your Pixel 7 or Pixel 7 Pro.
If you face any problems or have questions about the mentioned procedures, feel free to contact us. We will be happy to assist you. I hope this article has resolved the problem you were looking for. Thank you for reading.