If you’ve ever taken a photo with your iPhone, you know the frustration when the picture turns out blurry or distorted. This problem can range from a slightly blurry photo to a completely distorted image. Fortunately, there are some steps you can take to help fix blurry iPhone photos. In this article, we’ll provide tips on troubleshooting and fixing blurry images you’ve taken on your iPhone. So, if you want to take great photos with your iPhone 11, iPhone 12, iPhone 13, iPhone 14, and other models, read on to learn more.
Fix 1: Clean the Lens
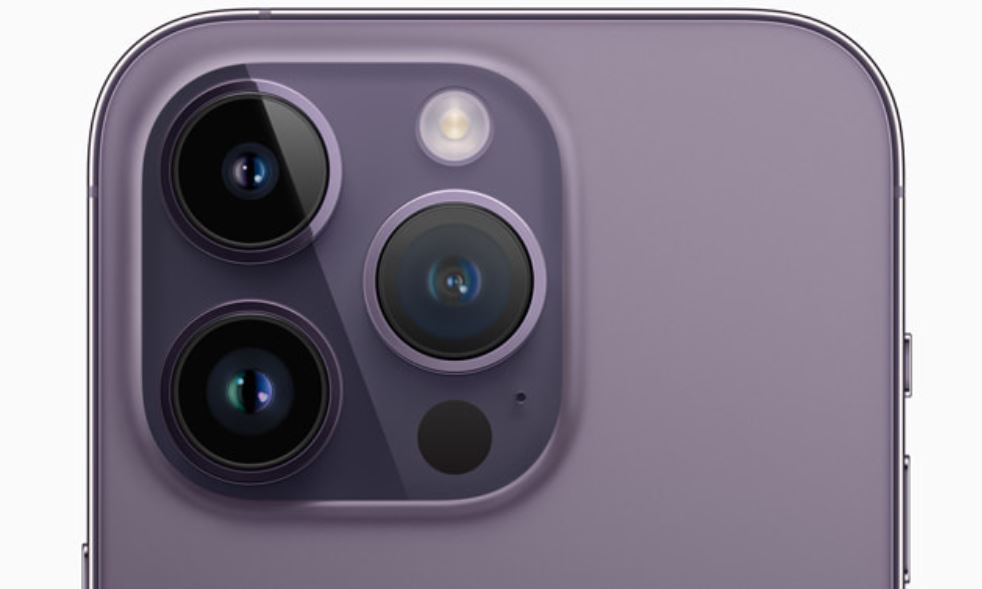
If you’ve noticed that your iPhone photos are blurry, you may need to clean the lens. The camera lens on your iPhone accumulates dust and dirt over time, which can cause images to appear out of Focus. Fortunately, cleaning your lens is a simple process.
To start, make sure your iPhone is powered off. You can then use a microfiber cloth to wipe the lens gently. If the lens is particularly dirty, you may want to use a solution of equal parts isopropyl alcohol and water. Dab the solution onto the cloth instead of directly onto the lens. Once you’ve cleaned the lens, use a dry portion of the fabric to dry the lens.
After you’ve cleaned the lens, turn your iPhone on and take a few test shots. If the photos are still blurry, move down to the next step.
To avoid this problem in the future, make sure to clean the lens of your iPhone regularly. A few swipes of a microfiber cloth every few weeks should be enough to keep your lens clean and your photos looking their best.
Fix 2: Remove the Phone Case
Phone cases provide essential protection for our phones and should not be neglected, but they can also create a barrier between the lens and your subject. The solution is easy: remove the phone case when you want to take a picture. This will allow the camera lens to be unobstructed and help ensure that your photos look crisp and clear.
It can be tempting to leave the phone case on, as it provides an extra layer of protection against scratches and drops. But it’s important to remember that phone cases can interfere with the clarity of the photos you take, so it’s best to take it off and put it back on when you’re done.
It’s also important to note that if you have an ultra-thin or transparent phone case, this may not be the problem.
Fix 3: Restart your iPhone
When your iPhone is restarted, it can help clear out any temporary software glitches causing your photos to appear blurry. Restarting your iPhone will also help improve your device’s performance and can help keep your images crystal clear.
To restart your iPhone:
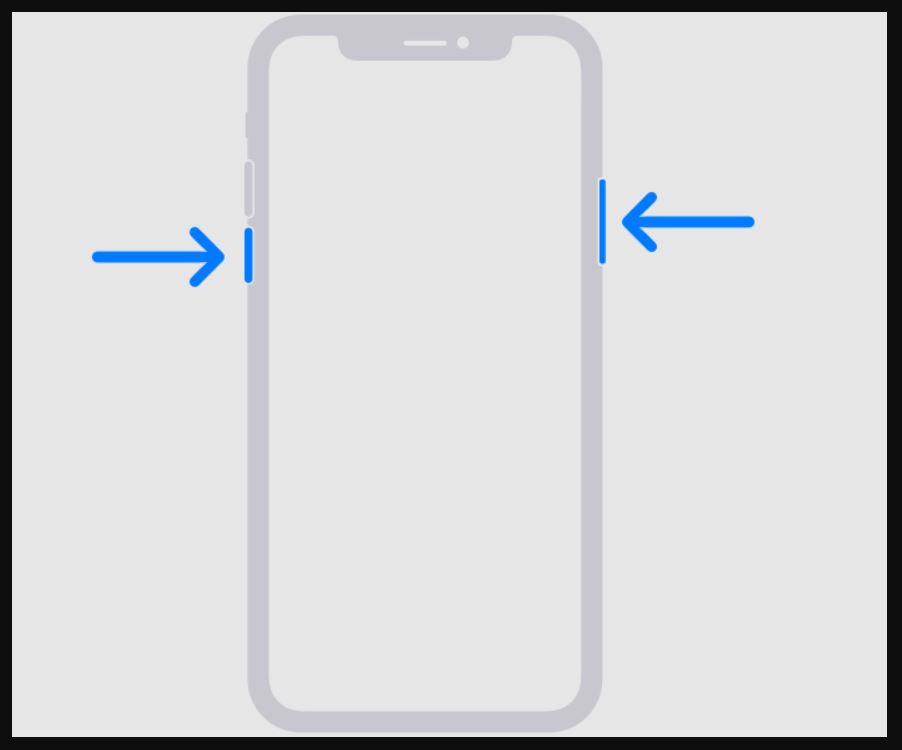
- Press and hold the Side button and any of the Volume buttons on your iPhone until the “Slide to Power Off” slider appears. Press and hold the Side button if you use an iPhone with a Home button.
- Slide the slider and wait for your device to turn off.
- Then press and hold the Side button again until the Apple logo appears, and your device will restart.
Once your iPhone has restarted, open the camera app and take a few test shots to check if the issue has been resolved. If your photos are still blurry, you may need to look into other solutions.
Fix 4: Use Tap to Focus
Often, photos on the iPhone turn blurry due to a lack of Focus. Fortunately, most iPhones have a “Tap to Focus” feature to help you fix this issue.
Tap to Focus, sometimes referred to as “Focus Lock,” is an iPhone setting that allows you to lock the Focus on a particular subject.
To use Tap to Focus, open the Camera app on your iPhone and tap on the area/object you want to focus on. The camera will then focus on that area, allowing you to take a sharp and clear photo. Once you’re satisfied with the Focus, click the picture.
Fix 5: Keep the Camera Stable
Another helpful tip is to ensure you don’t move the camera too quickly when taking a photo. If you move the camera too quickly, the image may become blurry as the camera struggles to keep up with the movement. To avoid this, try to keep the camera as still as possible when taking pictures.
Fix 6: Turn Off the Issue-causing Camera Settings
The iPhone camera has a bunch of settings to enhance your photography experience. However, these settings may sometimes cause issues like blurry photos. So, turning these features off is better until the problem is fixed. Here’s how:
- Open the Settings app.
- Tap on Camera.
- Turn off the following settings (if available):
- Prioritize Faster Shooting
- Scene Detection
- Lens Correction
Here’s an explanation of each of these settings:
The “Prioritize Faster Shooting” setting is designed to improve the speed of taking photos when you press the Shutter. However, this setting can also reduce the quality of the images, resulting in blurriness.
The “Scene Detection” setting attempts to optimize the photo’s composition and brightness based on the scene. However, as with the “prioritize faster shooting” setting, it can reduce image quality and cause blurriness.
Lastly, the “Lens Correction” setting can also cause blurry photos. This setting attempts to correct any lens distortion when using the iPhone camera. However, this setting can also reduce the photo’s sharpness, resulting in blurriness.
By turning off these settings, you should be able to reduce the chances of having blurry photos and increase the quality of their images. However, it would be best if you kept in mind that these settings can be helpful in certain situations and should be used when necessary.
Fix 7: Use Night Mode in Low-light
When shooting photos in low light, it can be challenging to get sharp, clear images with your iPhone. The dim light can cause blurriness, which can ruin a great picture. Thankfully, there is an easy solution— using Night Mode on your iPhone.
Note: Night mode is only available on iPhone 11 and later.
Night Mode helps to reduce blurriness when taking photos in low light. To use Night Mode on your iPhone, open the Camera app and tap the moon icon in the upper-left corner.
This will bring up the Night Mode options. You can then adjust the exposure time, determining how long the camera takes to capture multiple exposures. The longer the exposure time, the clearer the image will be. Once you have set the exposure time, press the shutter button to take your photo.
Fix 8: Check for Software Updates
Outdated software can also lead to blurry images. That’s why keeping your iPhone up to date is always a good idea. Follow these steps to check for software updates on your iPhone.
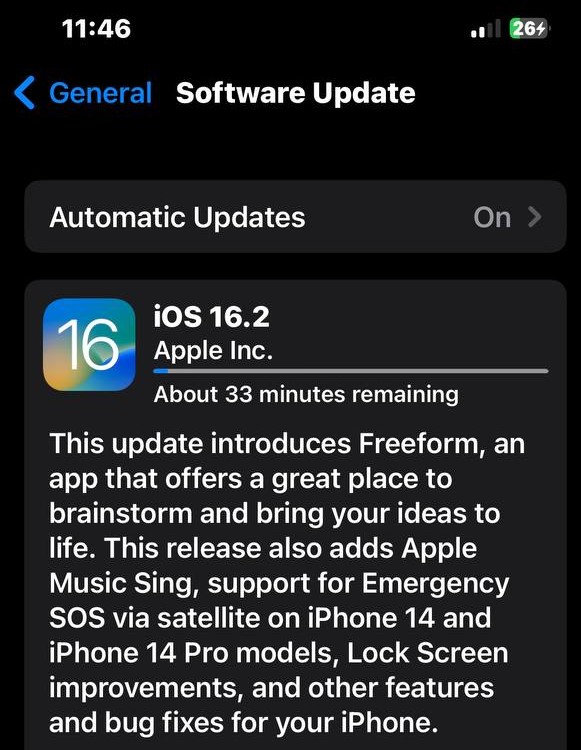
- Open the Settings app.
- Tap General.
- Tap Software Update.
- Download and install any available updates.
- Restart your iPhone.
Once you have updated your phone, you can check to see if the blurry photos issue has been resolved.
Fix 9: Reset iPhone Settings.
One of the most common causes of blurry iPhone photos is a software glitch in the Camera app. Resetting iPhone settings can often help solve the problem if this is the case. To reset your iPhone settings:
- Open the Settings app.
- Tap General.
- Tap Transfer or Reset iPhone.
- Tap Reset and tap on “Reset All Settings.” This will reset all of your iPhone’s settings, including the Camera app, so it’s important to note that you will lose any customizations you’ve made.
Once the reset is complete, open the Camera app and try to take a photo, and it should no longer be blurry.