Microsoft delivers updates for its products to improve their quality and cure any recent vulnerabilities. Security flaws are patched as soon as they are discovered, which is generally seen as a blessing. Despite this, these upgrades can occasionally have devastating results. Users working on anything essential should expect their computer to reboot after the updates have been loaded immediately. The user may lose crucial unsaved work due to this abrupt restart. It’s possible that updating isn’t as simple as it looks. Some upgrades may cause the system to become unstable. Microsoft usually gives a solution, but in certain cases, the customer will be left with no choice except to reinstall the whole operating system, which might result in data loss.
The update functionality in Windows 11 is fairly similar to that of Windows 10. Windows updates are difficult to regulate for users. We’ve explained how to turn off Windows 11 updates. Let’s see step-by-step methods to turn off automatic updates in Windows.
1. Disable automatic updates in Windows 11 using the Registry
Microsoft’s Windows Registry is a database that contains all of Windows’ configurations and settings. The Registry also stores all configurations relevant to the updating process. If you want to disable Windows 11 Update permanently, you may change the registry settings to do so.
- First of all, you have to open the Registry editor. To open it, go to Run > regedit.
- Now open the following key from the left-hand tree HKEY_LOCAL_MACHINE\ SOFTWARE\ Policies\ Microsoft\ Windows.
- Now click on the Windows folder, create a new folder, and name it WindowsUpdate.
- Create a new Key named AU by right-clicking the newly formed WindowsUpdate folder.
- Create a new DWORD (32-bit) value named NoAutoUpdate in the right-hand window after selecting AU.
- Now open NoAutoUpdate and set its value to 1.
- Restart the PC.
The automated Windows update procedure will be disabled as a result. However, you will be able to manually check for, download, and install updates via Settings –> Windows Update. Suppose you do not want to go through the Registry editing procedure. In that case, you may download the following batch file, which will create the keys mentioned above and adjust the necessary values for you.
However, if you want the automatic updates to be enabled again in your Windows, run the following command in the command prompt. It will again enable the automatic Windows updates option.
reg add "HKEY_LOCAL_MACHINE\SOFTWARE\Microsoft\Windows\CurrentVersion\WindowsUpdate\AU" /v AUOptions /t REG_DWORD /d 0 /f
2. Stop automatic Windows 11 update using the group policy editor
Users can also stop the automatic Windows 11 update option using the local group policy editor. Follow the steps mentioned below to turn on the automatic update option in Windows successfully.
- To open Group Policy Editor, Go to Run > gpedit.msc
- Now go to the following folder from the left-hand pane
Computer Configuration > Administrative Templates > Windows Components > Windows Update>Manage end user experience
- Now go to the Configure Automatic Updates option from the left-hand pane of the windows.
- Now you’ll see three states, i.e. Not configured, Enabled, and Disabled. Select it to the Disabled.
- Now click on OK and proceed. This will stop Windows updates from being automatically checked, downloaded, and installed. You’ll have to go into Windows Update Settings and manually check for and download updates.
3. Turn off automatic Windows 11 update using the service
- Go to Run, then head to services.msc to open the service management console.
- Now you’ll see multiple lists of services; find Windows Update from it.
- Now click on it and change the startup type to Disabled; it will be set to Manual.
- Done
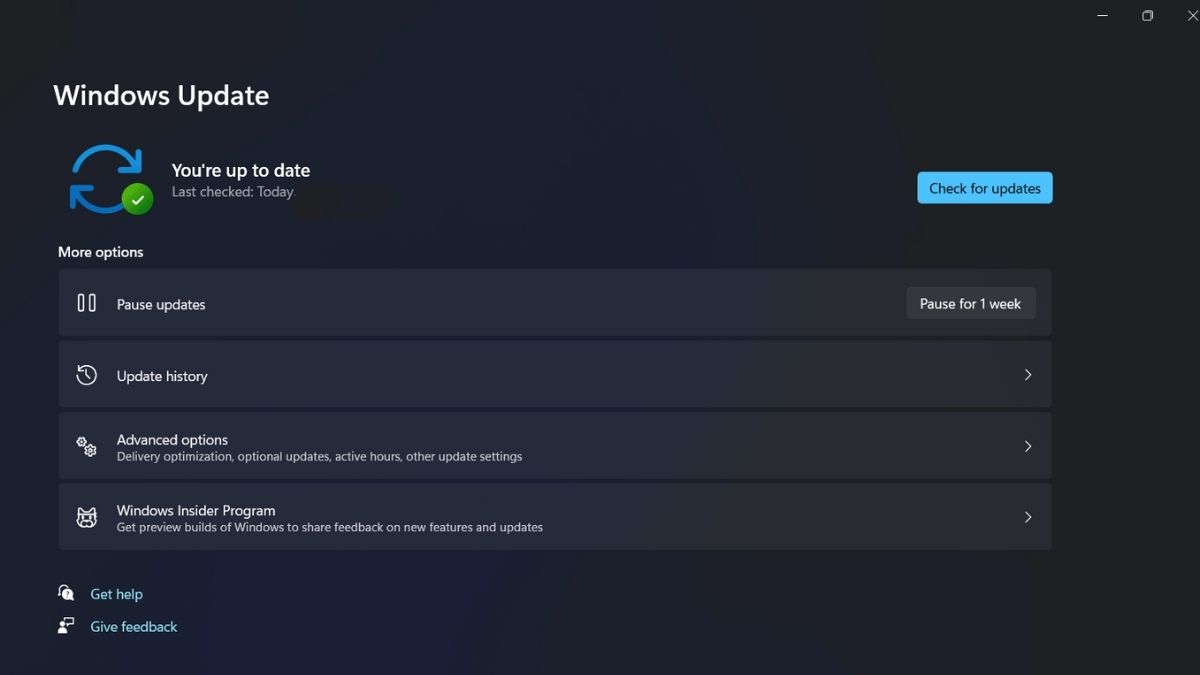
Alternatively, you may temporarily pause Windows updates in the Settings app, enable metered connections, or enable power saver mode. Even though Windows will pause the update process if these options are set, we do not suggest them because they are temporary solutions and influence other Windows 11 capabilities.
It’s possible to configure this option via the Registry approach if you’re a more skilled user. Disabling the Windows service would suffice for others.